You can refer the previous parts of this article as follows.
The Problem
In the previous article (Part 2 of this series), we have discussed how to use Spring Cloud Bus to broadcast the refresh event ( /actuator/bus-refresh) across all the connected services. In here the refresh event should be manually triggered on any service that is connected to the Spring Cloud Bus. (You can select any service as you wish. The only requirement is that it should connect to the Spring Cloud Bus).
The main problem here is that whenever the properties are changed, the refresh event should be manually triggered. Even if it is for just one service, it is still a manual process. What will happen if the developer forgets to manually trigger the refresh event after updating the properties in the remote repository?
Wouldn’t be nicer if there is any way to automate this refresh event triggering whenever the remote repository is changed. In order to achieve this, the config server may need to listen for the events of the remote repository. This can be done with webhook event feature provided by the remote repository providers.
The Solution
Here is the architecture of the proposed solution.
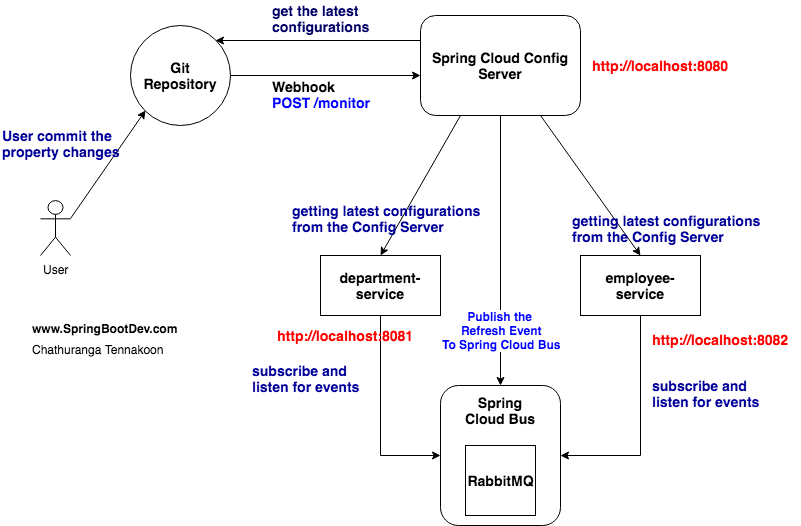
Whenever the update is pushed to the Git Repository, it will send the Webhook event to the registered application. That is the /monitor endpoint of the Spring Cloud Config Server.
Then the Spring Cloud Config Server will retrieve the latest configuration property changes from the Git repository and publish the refresh event to the Spring Cloud Bus. This refresh event is published with Spring Cloud Stream.
All the distributed application services will connect to Spring Cloud Bus and will listen for the refresh event published by the Spring Cloud Config Server. The Spring Cloud Bus will broadcast the refresh event across all connected application services. Therefore it is guaranteed that the the published refresh event will be received by every distributed service (Config Client) that is connected to the Spring Cloud Bus.
Every Config Client (application service) has the Spring Boot Actuator in its classpath. Therefore all the application services can accept and handle the refresh event with no issue. Then all the beans annotated with @RefreshScope will be refreshed and the properties will be re-fetched. That means the Config Client will communicate with Config Server to retrieve the latest configuration properties for the related to the annotated beans.
The Config Server pulls the latest configurations from the Git repository (property source) and updates the Config Sever itself. After the Config Client requests for getting the properties will be served with latest updated properties.
Finally the Config Client will receive the latest and updated properties through the Config Server.
Setting up the RabbitMQ Message Broker
Please follow the instructions in the previous article. Click here to visit it.
Creating the Spring Cloud Config Server
The config Server should have the following dependencies in its class-path.
<dependency>
  <groupId>org.springframework.cloud</groupId>
  <artifactId>spring-cloud-config-server</artifactId>
</dependency>

<dependency>
  <groupId>org.springframework.cloud</groupId>
  <artifactId>spring-cloud-starter-stream-rabbit</artifactId>
</dependency>

<dependency>
  <groupId>org.springframework.cloud</groupId>
  <artifactId>spring-cloud-config-monitor</artifactId>
</dependency>
The complete source code of the Spring Cloud Config Server can be found at GitHub. Please visit the GitHub repository for the completed source code.
spring-cloud-config-monitor
spring-cloud-config-monitor provides a /monitor endpoint for the Config Server to receive notification events when the properties backed by a Git repository are changed. This will work if and only if spring.cloud.bus property is enabled.
Not Clear? Lets discuss in more detailed.
Many source code repository providers (such as Github, Gitlab, or Bitbucket) notify you of changes in a repository through a webhook. You can configure the webhook through the provider’s user interface as a URL and a set of events in which you are interested. For instance, Github uses a POST to the webhook with a JSON body containing a list of commits.
If you add a dependency on the spring-cloud-config-monitor library and activate the spring.cloud.bus.enabled property in your Config Server, then the /monitor endpoint will be enabled. This can be done by adding the following entry in the application.properties of the Spring Cloud Config Server.
spring.cloud.bus.enabled = true #add to the application.properties of Config Server
By default spring.cloud.bus.enabled is set to false, meaning the Spring Cloud Config Server won’t use Spring Cloud Bus capabilities to process Git push events notifications.
When the webhook is activated, the Config Server sends a refresh event targeting the applications that the property changes should be reflected. (e.g:- RefreshRemoteApplicationEvent)
By default, it looks for changes in files that match the application name (for example, department.properties is targeted at the department application, while application.properties is targeted at all applications).
Spring Cloud Stream (spring-cloud-starter-stream-rabbit)
Spring Cloud Stream is a framework that supports in developing message driven or event driven microservices. spring-cloud-starter-stream-rabbit is a specific implementation of Spring Cloud Stream that uses RabbitMQ message broker as underlying message broker.
e.g:- If you want to use the Kafka as the underlying message broker, then you have to use the dependency spring-cloud-starter-stream-kafka instead of this.
spring-cloud-starter-stream-rabbit is used to send/publish event notifications from the Config Server to a RabbitMQ exchange (again, only if spring.cloud.bus property is enabled). The Spring Cloud Bus will broadcast the event (refresh event) to all related services.
Since the Spring Cloud Stream is published the event to the RabbitMQ, it should have the related connection details in application.properties. Therefore add the following RabbitMQ connection details to the application.properties of the Spring Cloud Config Server. (Change the connection details according to your RabbitMQ message broker)
spring.rabbitmq.host=localhost
spring.rabbitmq.port=5672
spring.rabbitmq.username=guest
spring.rabbitmq.password=guest
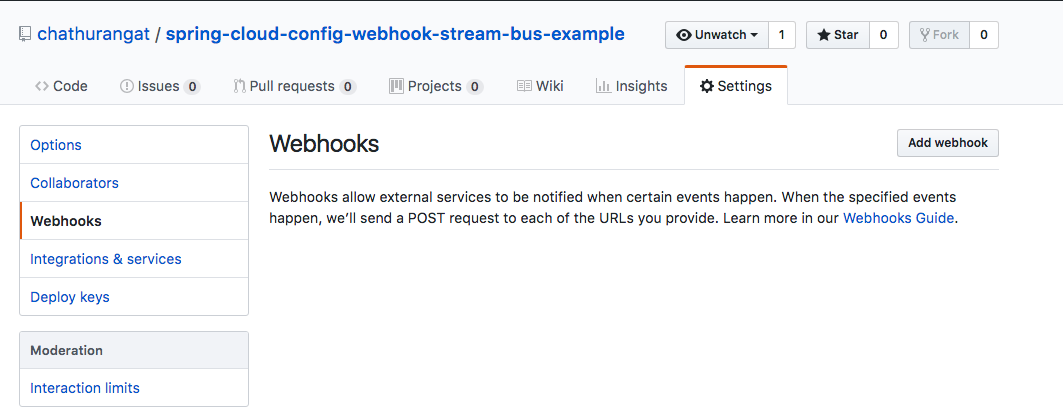
Adding the Webhook event with GitHub
You can add the /monitor endpoint URL as the webhook URL of your repository. No that, this will not work for localhost domain. You should have a public domain name or public ip address.
Creating department-service and employee-service
department-service and employee service are almost same as the previous article. Please visit the GitHub repository for the completed source code of the department-service and employee-service.
What is the difference between Spring Cloud Stream and Spring Cloud Bus?
Spring Cloud Stream is a framework that helps to develop message driven or event driven microservices. It uses underlying message broker (such as RabbitMQ or Kafka) to publish event and messages across application services.
Spring Cloud Bus connects the distributed services through a message broker (known as RabbitMQ or Kafka). Therefore it can broadcast and deliver the published event and message to the related service. Spring Cloud Bus is built on Spring Cloud Stream. Therefore Spring Cloud Bus can be identified as the application use of Spring Cloud Stream.
Commit and push the changes
Now all our application services should run on three different ports as follows.
8080 - config server
8081 - department-service
8082 - employee service
Lets change the value of the ‘app.service-name‘ of the employee-service.properties and department-service.propeties to some other value(s). Then commit and push the changes.
Auto refreshing with webhook event
Once the Git repository received the pushed update, it will notify the given URL endpoint with set of parameters (The URL will be registered during the webhook registration process). This is known as triggering the webhook event.
If you do not have a public domain or ip address mapped to your /monitor endpoint, the GitHub webhook event will not work. In this case, you have to simulate the webhook event as follows.
Simulating the webhook event
As i described earlier, the GitHub will trigger the webhook event for the given URL. Therefore in order to receive the webhook event published, you should provide the public domain name or public ip address. (The localhost and local ip addresses does not work).
If you do not have public ip address or public domain name set up yet, you can publish (simulate) the webhook event for the Config Server by calling the /monitor endpoint with given request body. Then the Config Server will consider it as a webhook event published by the related repository service provider and continue with rest of the operations.
curl -v -X POST "http://localhost:8080/monitor" \
-H "Content-Type: application/json" \
-H "X-Event-Key: repo:push" \
-H "X-Hook-UUID: webhook-uuid" \
-d '{"push": {"changes": []} }'
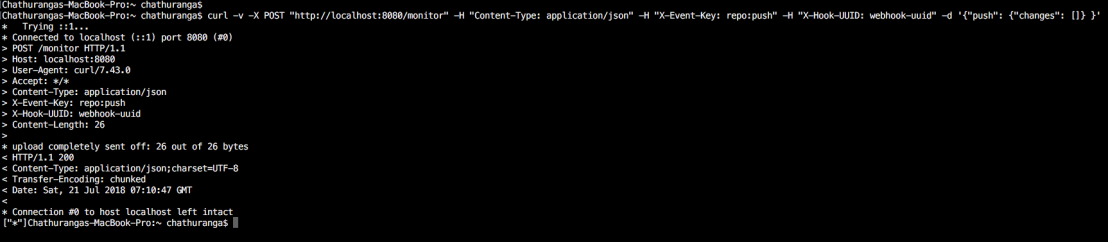
Here the http://localhost:8080/monitor of the monitor endpoint of the Spring cloud Config Server. You can change it according to your server configurations.
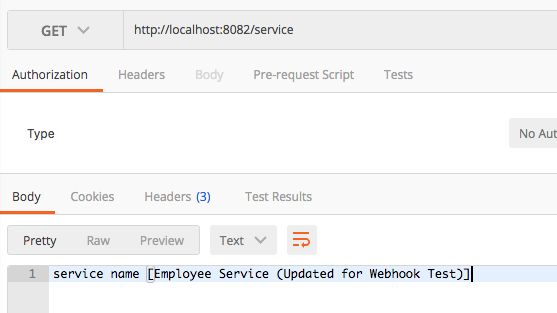
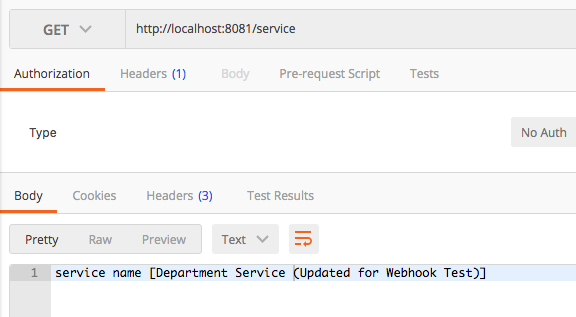
Testing the changes in application services.
Lets invoke the related /service endpoints of both department-service and application-service. You can see that services have been updated with newly changed properties. We didn’t invoke/trigger the refresh event manually for any service and all of them were get updated as a result of webhook.
Testing the department-service
Testing the employee-service