In this article, i am going to show you how to generate webpack.config.js file with webpack-cli. After that we will look at the each component of the generated webpack.config.js in detailed with their usage.
webpack.config.js is the file that contains the webpack related configurations for the project. This will be read by the webpack process when it starts its execution.
You need to follow the instructions given below to generate webpack.config.js for your NPM based project.
NPM (Node Package Manager) is a package manager for the JavaScript programming language. It is the default package manager used in NodeJs. It enables the path of accessing thousands of reusable javascript libraries for your project.
NPM was initially developed as the package manager of the NodeJs. Therefore NPM is distributed (available) with the NodeJs installation.
NPM (Node Package Manager) and NodeJs Server
Here we are going to create a project that manage its dependencies with NPM. Therefore if you dont have the NPM installed in you development environment, please visit the NodeJs website and install the NodeJs. If you instal the NodeJs, you will get both NPM (Node Package Manager) and NodeJs Server. Since the Node Server is available, it can be used as a development server to deploy the project files.
In this article i am going to explain how to use the Babel compilerfor compiling the javascript from ES6(or higher ES version) to ES5 compliant version. In addition, the webpack will be used for executing barbel compiler and bundling the multiple javascript dependencies into a single file.
The majority of the internet browsers are supported to run ES5 compliant JavaScript. Therefore if you develop your application with ES6 or any other latest ECMAScript version, you may need to compile or transform it into ES5 compliant version for running it in most of the available browsers.
What is Babel?
Babel is a JavaScript transpiler (or known as javascript compiler). Babel enables us to write modern JavaScript that will be “transpiled” to widely-supported ES5 JavaScript. We call this process as “transpiling”.
In this article, i am going to develop simple NodeJs application that uses following technologies.
ES6 (ECMAScript6) based JavaScript Syntaxes
Babel for transpiling/compiling ES6 syntaxes into ES5.
Webpack for executing babel transpiler and bundling JavaScript files into a single file
ExpressJs as the web application framework for NodeJs
Lets move forward to build our NodeJs application with ExpressJS using ES6+ JavaScript syntaxes.
Initializing the project and creating the package.json file.
NodeJs project should be a NPM based (managed) project. That means the dependent packages of the project should be managed with NPM. This can be achieved by creating the package.json file for the project.
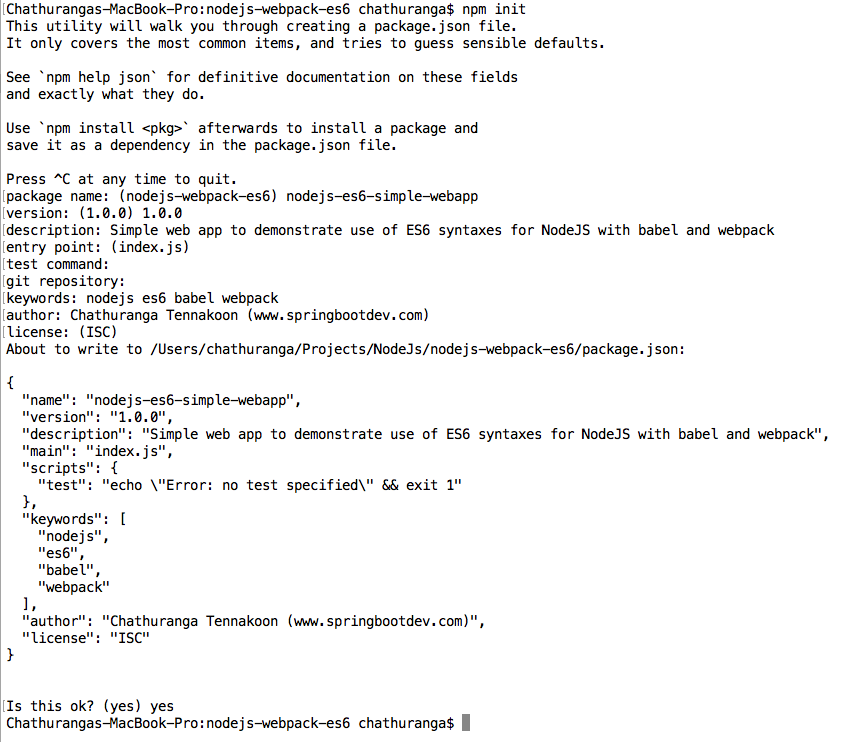
The following command can be used to create the package.json file with required intial configurations.
npm init
Once the npm init command is executed, you need to provide the project related details for the package.json. Please refer the below screenshot.
Now the package.json is created and we can start the development of our NodeJs application.
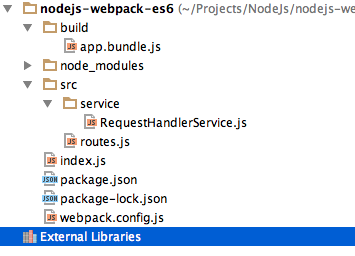
Creating the project directory structure
The final project structure should looks like below. Don’t worry at the moment. we will add each of files while we are moving forward with the article.
Adding the external libraries and dependencies for the project.
As i have already pointed out, our NodeJs application depends on few external dependencies and they can be listed as below.
Express.js
Babel
Webpack
We will move forward on installing each of these dependencies.
Installing Express.js dependency
Express.js is a web application framework for NodeJs. It has set of utility methods that simplifies the development of the NodeJs applications. Express.js is not bundled with NodeJs installation and we need to install it separately. It can be done with following command.
npm install express --save
After executing above command, you can see that ExpressJs has been added to the dependencies list of the package.json file.
Installing Babel dependencies
Babel is used to transpile ES6+ based source code into ES5. This should be installed as a development related dependency as the transpiling is happened in the development environment. The following command will install the babel related dependencies in the development environment.
Once the above command is executed successfully, you can see that the babel dependencies are installed under the devDependencies of the package.json
Installing the webpack dependencies
So we will be moving forward with setting up webpack. First we need to install the webpack dependencies for the project and there are two dependencies required.
webpack
webpack-dev-server
These dependencies can be installed with following command.
npm install webpackwebpack-dev-server --save-dev
So once the dependencies are installed, we need to create a webpack.config.js file and do the necessary configuration for the webpack.
–save : This will create a dependency entry under the dependencies of the package.json
–save-dev : This will create a dependency entry under the devDependencies of the package.json
Once all the required dependencies are installed, the package.json of the project should looks like below. (This is just a sample snapshot of package.json and the versions of the dependencies can be different)
create an index.js file in the root of your project. The file should contains the following source.
This file contains bidirectional Unicode text that may be interpreted or compiled differently than what appears below. To review, open the file in an editor that reveals hidden Unicode characters. Learn more about bidirectional Unicode characters
This is the entry point of your NodeJs application. This contains the application logic for spinning up the web server and handling the application routes (HTTP Routes)
This will create a web server and listen for the port 2000. All the requests comes to the web server will be handled by the routes module developed in this application. we go through the routes module of the application in a while.
As you can see that we are using the ES6 based import here instead of ES5 based require. If you observe most of the source code in this project, you will notice that we have used ES6+ based syntaxes most of the places.
RequestHandlerService.js
This class hans been added demonstrate the robust features of ES6+ (Just to show the beauty of ES6+). This class will contain a simple method of handling HTTP request.
This file contains bidirectional Unicode text that may be interpreted or compiled differently than what appears below. To review, open the file in an editor that reveals hidden Unicode characters. Learn more about bidirectional Unicode characters
This method has been annotated with async. Therefore it guarantees that the method will return a promise.
routes.js
This file will contains the all the HTTP Route handlers related to this project. I am not going to explain all the route handlers here. I will just describe few of them for your understanding.
This file contains bidirectional Unicode text that may be interpreted or compiled differently than what appears below. To review, open the file in an editor that reveals hidden Unicode characters. Learn more about bidirectional Unicode characters
Lets look at some of the selected routes in detailed. If you want to learn more about ExpressJS routing, it is recommended to read http://expressjs.com/en/guide/routing.html
router.all('/*', function (request, response, next) {
    console.log(" this will be applied to all routes ");
    next();
});
There is a special routing method, app.all(), used to load middleware functions at a path for all HTTP request methods. For example, the above handler is executed for requests to the route “/*” (for any route) with HTTP GET, POST, PUT, DELETE, or any other HTTP request method supported.
next() will delegate the request to the next available middleware or route.
handleHttpRequest (Async method) of the RequestHandlerService has been invoked in this route handler. Since the route handler function(arrow function) is modified with async keyword,it is possible to use the await keyword to wait for the result from the method invocation.
If you observe the last line of the file, you can see that we have export the module router. So the outside script can use this module.
module.exports = router;
webpack.config.js
Add the webpack.config.js file in the root of your project.The webpack.config.js related to this project can be shown as follows.
This file contains bidirectional Unicode text that may be interpreted or compiled differently than what appears below. To review, open the file in an editor that reveals hidden Unicode characters. Learn more about bidirectional Unicode characters
Using webpack, running/traspiling your JavaScript and JSX through Babel is a simple as adding the babel-loader to your webpack.config.js. It has been added as a loader and it will go through all js and JSX files. It uses the babel-preset-env as defined and excludes the files in the node_modules directory.
babel-polyfill will be added and managed by the webpack. In addition, index.js has been designated as a entry point js file for the project.
The output file will be stored in the build directory using file app.bundles.js.
Testing and Running the application.
Now we have come to the final section of our article. Here we will run the nodeJs application and test each application route. In oder to run the application , we need to transpile the ES6+ syntaxes of the project into the ES5.
Transpiling/Compiling ES6+ syntaxes into ES5 with Babel and Webpack
Now we need to transpile/convert the ES6+ based source code into ES5 based source. This can be done with babel. In this project we use webpack to execute babel using babel-loader for the source code transpiling. In oder to achieve this, go to the root of the project where your webpack.config.js is located. Then run the following command to build the project.
webpack
Running the NodeJs application
Then you can see that project is build and final file is created in build/app.bundle.js. This is the file that should be run with node.
node build/app.bundle.js
Once the above command is executed, it will create a web server and up the NodeJs project. please refer the below screenshot.
You can see that server is up and application listen on port 2000 for incoming HTTP requests.
Executing both transpiling and running commands with NPM
We can combine both commands together and add a new command under the scripts of the package.json
"execute": "webpack && node build/app.bundle.js"
Now you can run following command to build and run the project. It will first build the project with webpack and then run the build file with node.
npm run execute
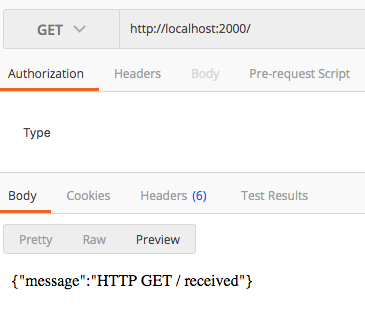
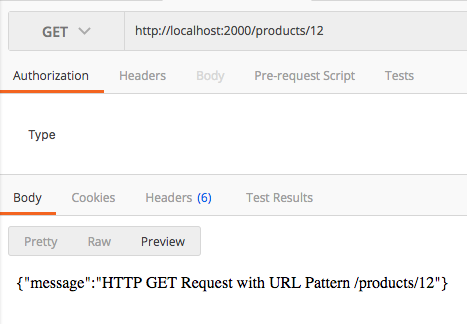
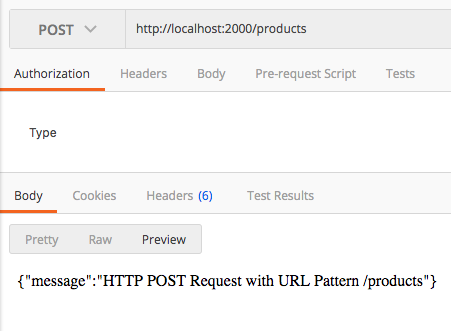
Now lets access each HTTP route with postman as follows.
The source code has been added without the node_modules directory. Therefore run the following command to install the required dependencies for the project. This will install the dependencies locally for your project.
npm install
After that you can run project with following command.
npm run execute
This is the end of the article. If you have any concern or need any help, feel free to contact me.